I’ve spent more evenings than I’ll admit coaxing my cat into looking photogenic, and one lesson stands out: dark pet eyes don’t need more light — they need the right light. With a cheap ring light and a few simple tweaks, you can turn those deep, inky pupils into soulful, reflective orbs that make any photo or video feel cinematic instead of flat or glassy.
Why a ring light works (and what to avoid)
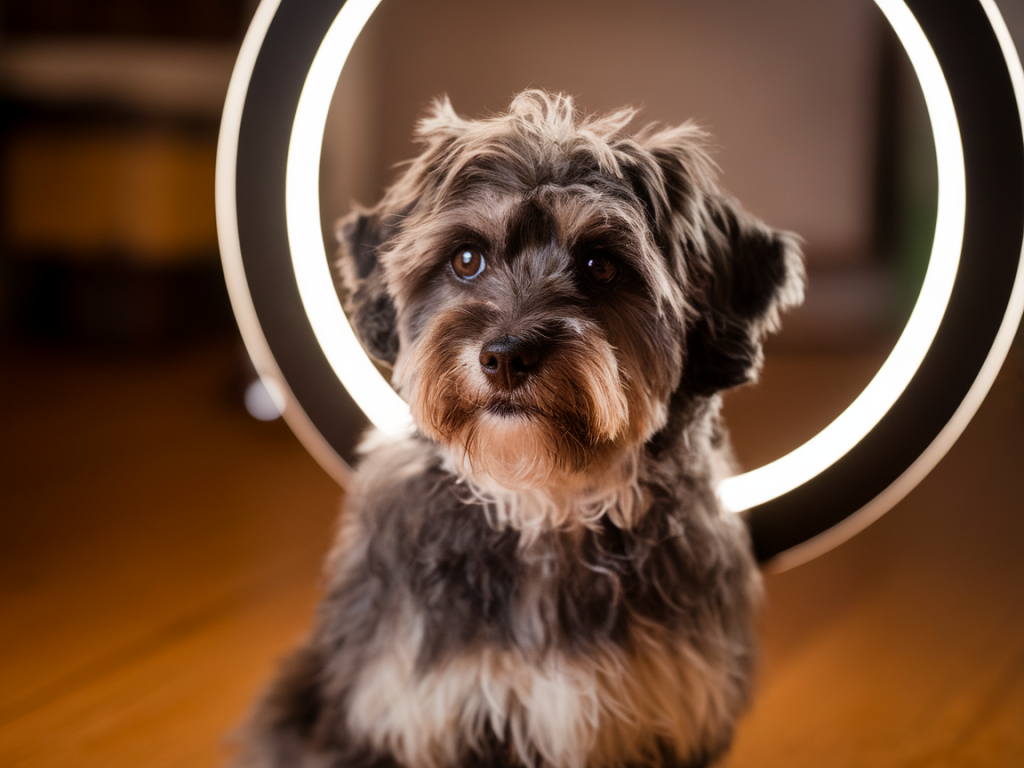
Ring lights are popular because they give an even, flattering light and create that distinctive circular catchlight in the eye. For pets with dark eyes, that catchlight is everything — it adds depth and emotion. But a ring light can also create unpleasant reflections, overblown highlights, or make eyes look like lifeless black marbles if used too hot or too close.
What I aim for when shooting pets:
The best cheap ring light settings for soulful dark eyes
Here’s my go-to starting point when I’m using an affordable ring light (think 10"–18" models like Neewer, UBeesize, or generic LED rings):
| Ring light size | 10"–18" (portable) or 18"–19" for more even coverage |
| Color temperature | 3200K–4000K (warm to neutral) |
| Brightness | 20%–40% (low to medium) |
| Distance to subject | 2–3 feet for small pets; 3–5 feet for medium/large |
| Angle | At eye level or slightly above (10°–20°) |
| Diffusion | Use built-in diffuser or add a soft cloth/diffuser panel |
Why warm/neutral (3200K–4000K)? Cooler blue light (5600K) can flatten dark irises and emphasize shine rather than depth. A slightly warmer temperature gives the eyes a richer, more inviting glow and complements most fur tones.
Practical step-by-step setup
Follow these steps when you want soulful eyes on camera:
Angles, catchlights, and eye shape
Not all catchlights are created equal. A single, round catchlight off-center in the iris looks most natural and soulful. If your ring creates two very bright spots (from reflections of the inner and outer ring), try:
For deep-set or very dark eyes, I like the catchlight slightly to the upper left or upper right of the pupil — it mimics natural window light and adds dimension.
When to use higher brightness or colder temps
There are times when you want a different vibe: energetic, high-contrast videos (playing with your dog, for instance) might benefit from a cooler temp (4500K–5600K) and higher brightness. But for soulful, emotional close-ups, keep it warm and gentle.
Accessories and cheap upgrades that help
Even with a budget ring light, a few inexpensive extras make a big difference:
Troubleshooting common problems
If you’re not getting that soulful look, try these quick fixes:
My favorite budget picks
I often reach for these affordable options because they’re reliable and easy to tweak:
All of them work well as long as you control distance and diffusion. Personally, I prefer the 14"–18" range for pet portraits because the catchlight looks more natural and soft.
Finally, remember patience beats technique with animals. Give treats, take breaks, and let your pet get used to the gentle hum of the LEDs — the best soulful look often comes when they’re calm, relaxed, and looking right at you.